
使用picgo和github,搭配typora配置图床
AI-摘要
GPT
AI初始化中...
介绍自己
生成本文简介
推荐相关文章
前往主页
前往tianli博客
本文最后更新于 2024-04-14,文章内容可能已经过时。
使用picgo和github配置图床,搭配typora使用
typora作为markdown超级好用的工具,用来写markdown文档很舒服,但是上传图片的时候很麻烦,现在记录配合picgo && github 图床使用。
1. 创建github仓库
这个步骤省略了,可以完全自行百度
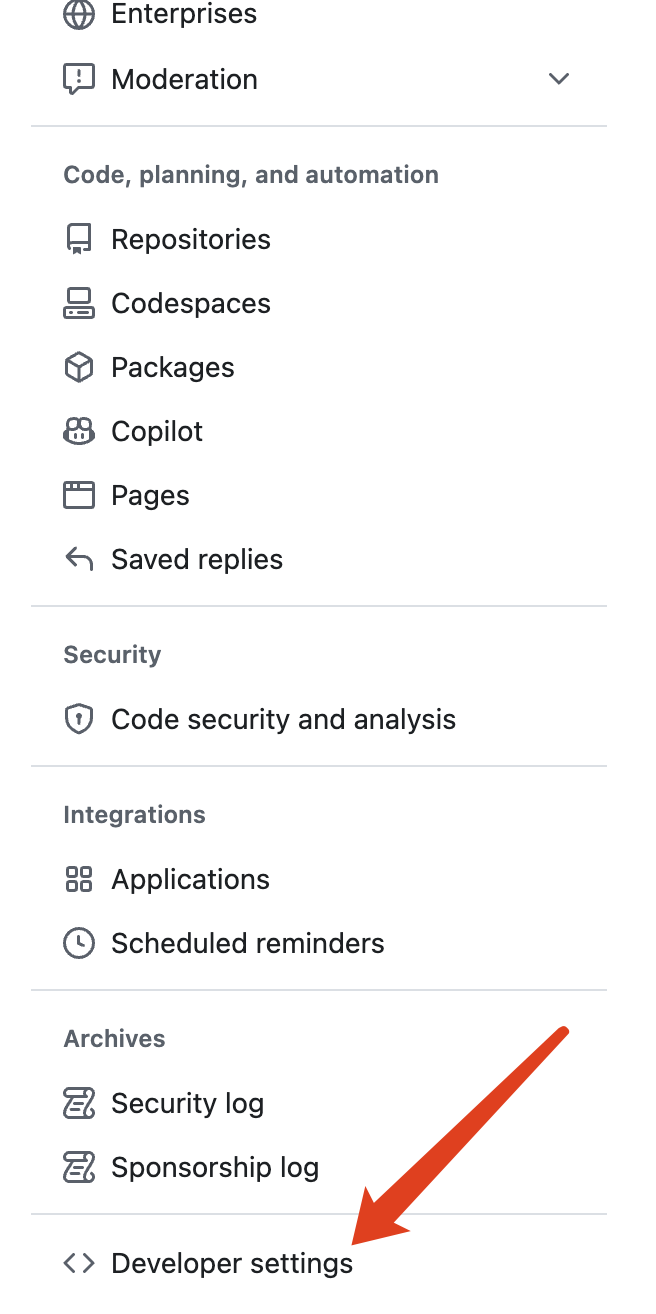
2. 创建一个token
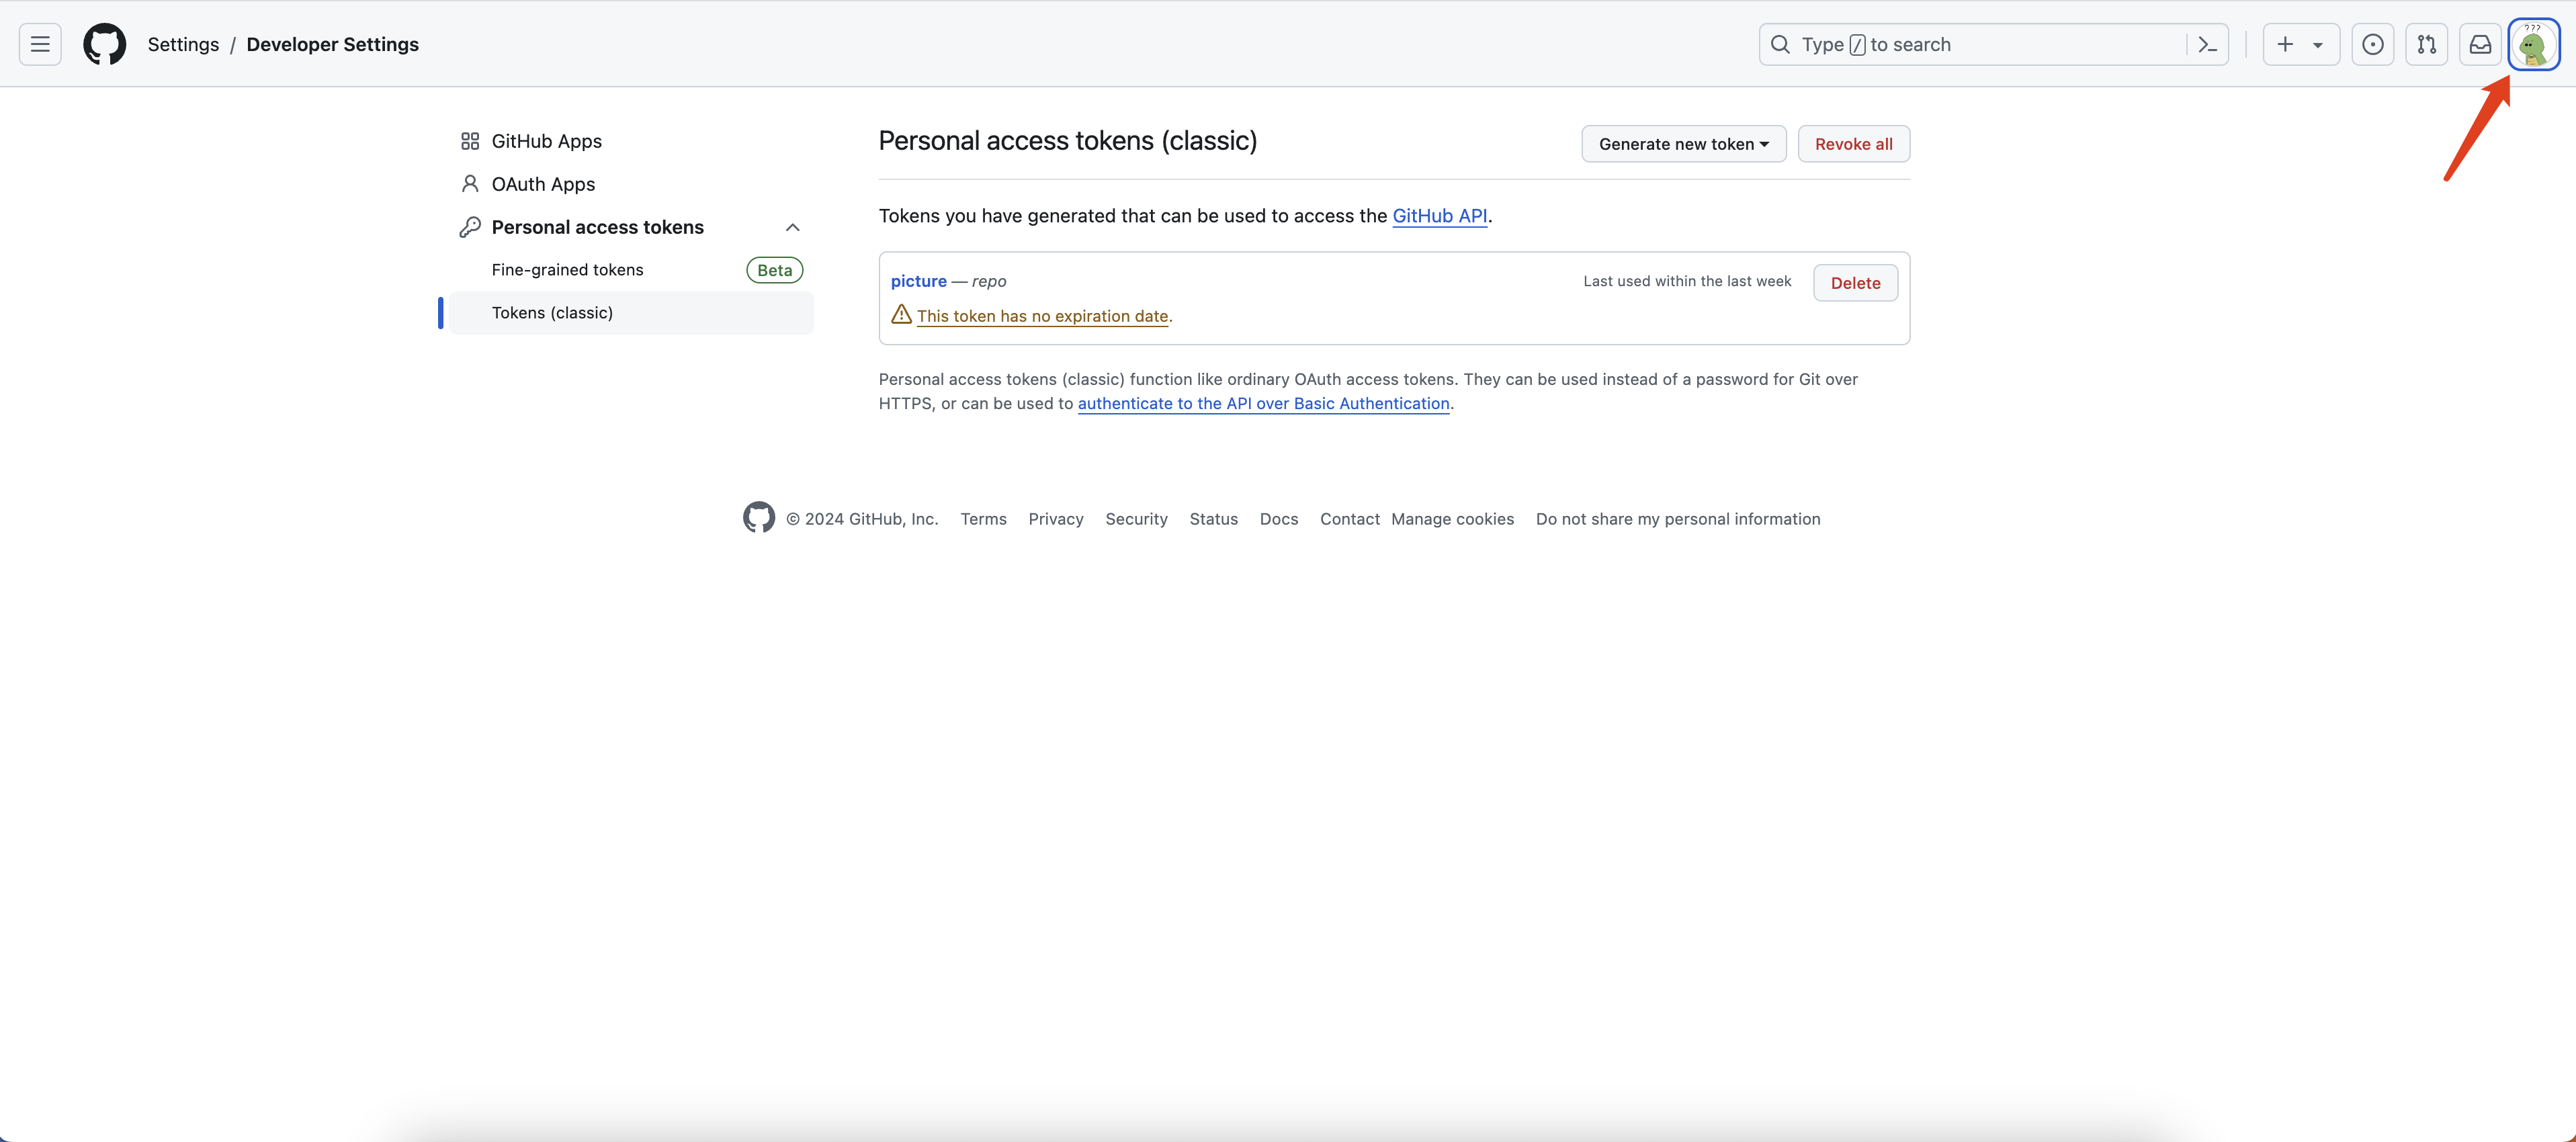
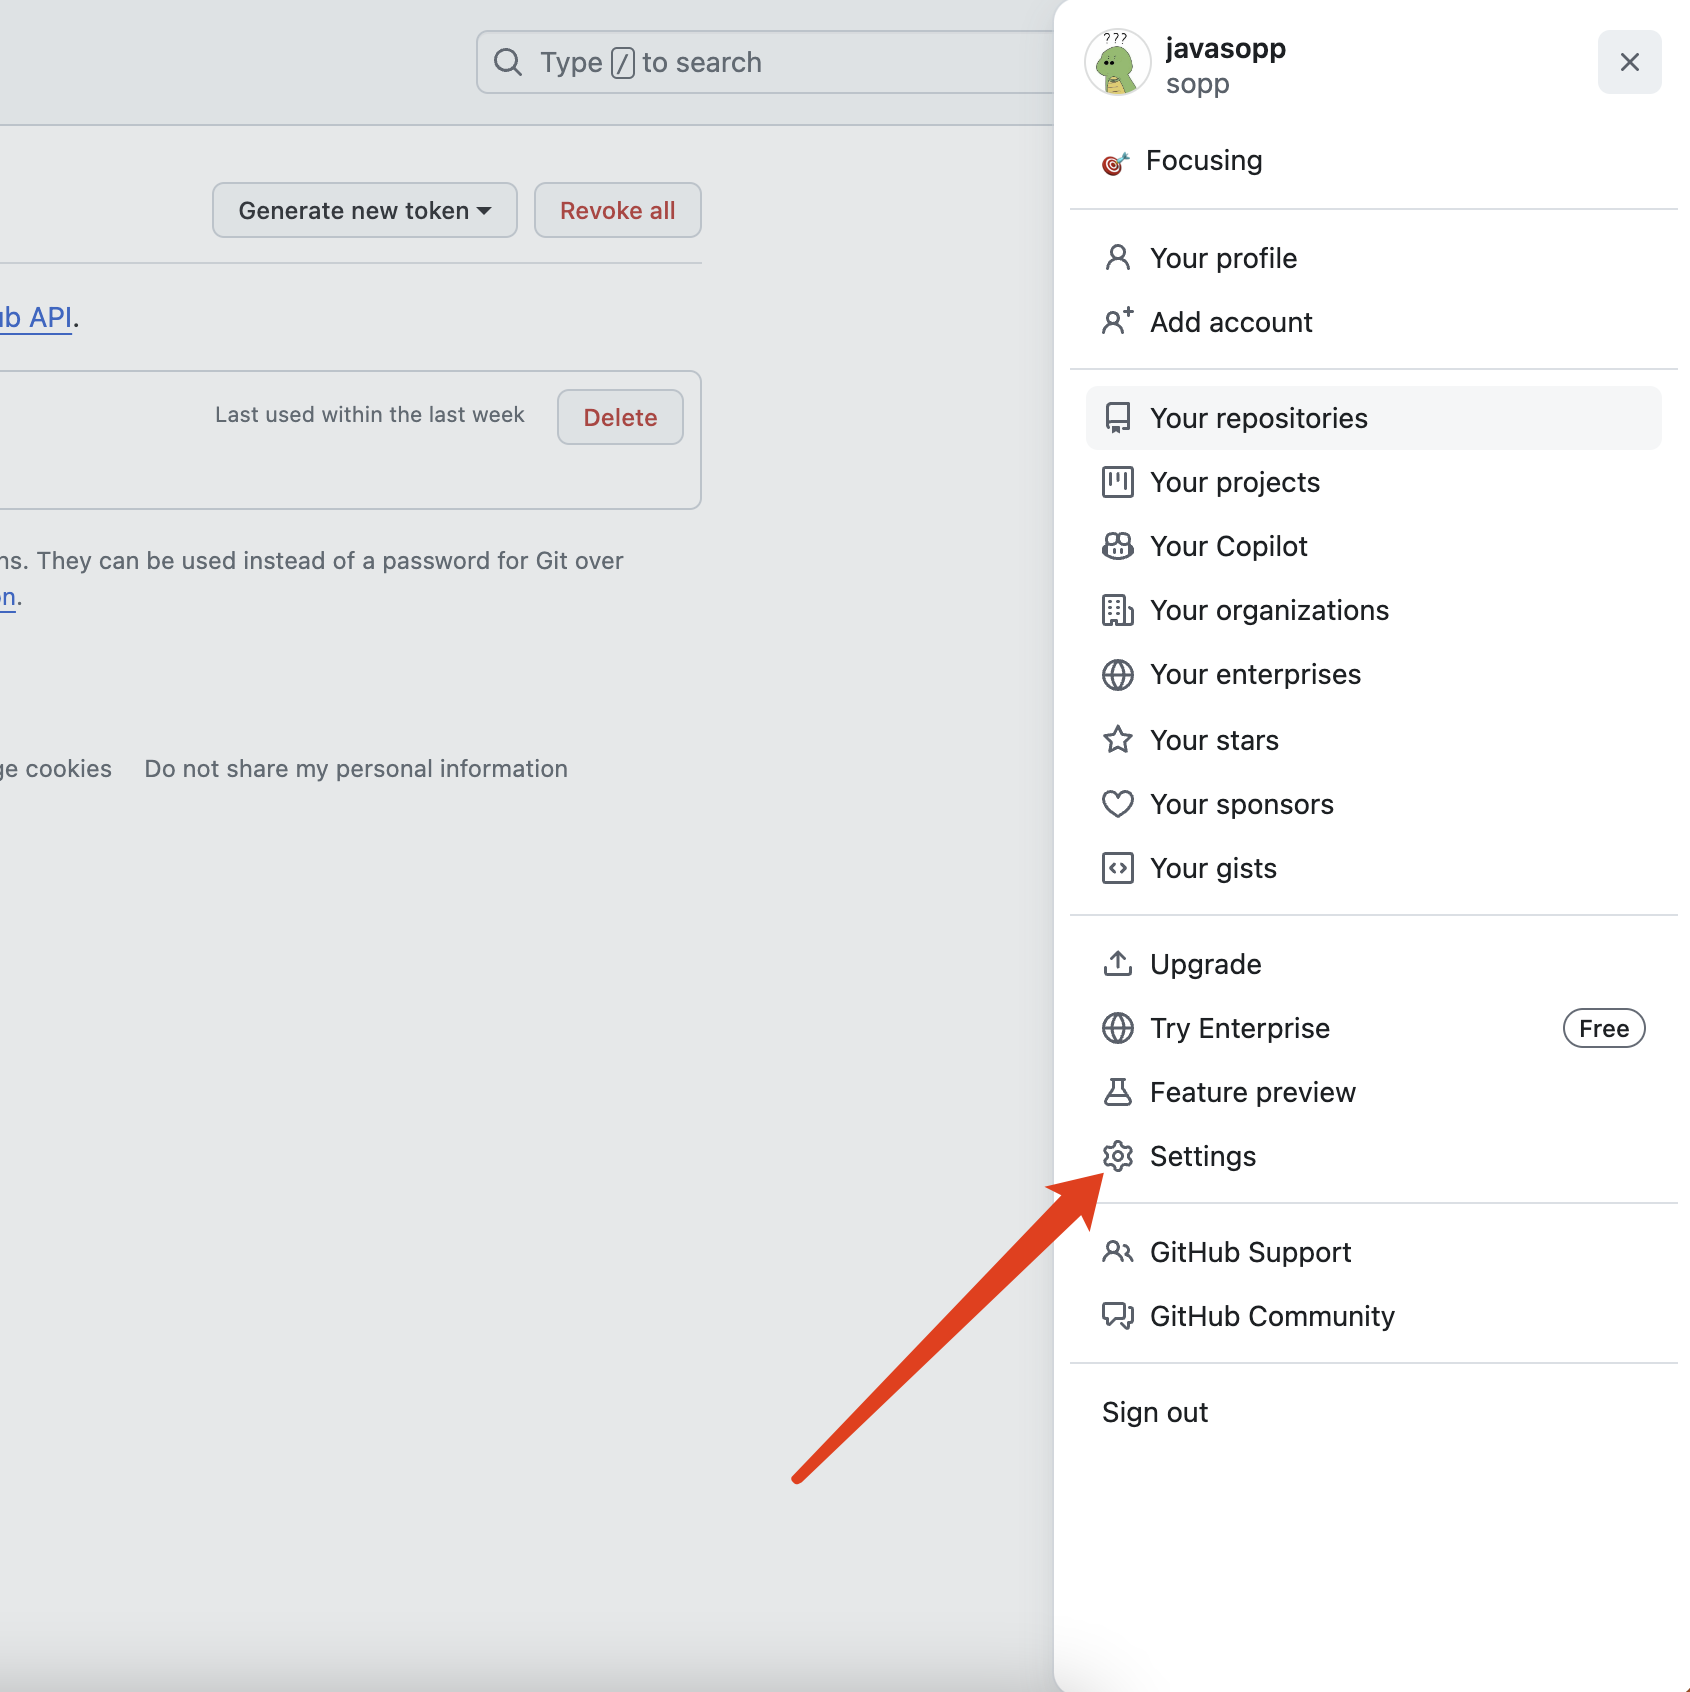
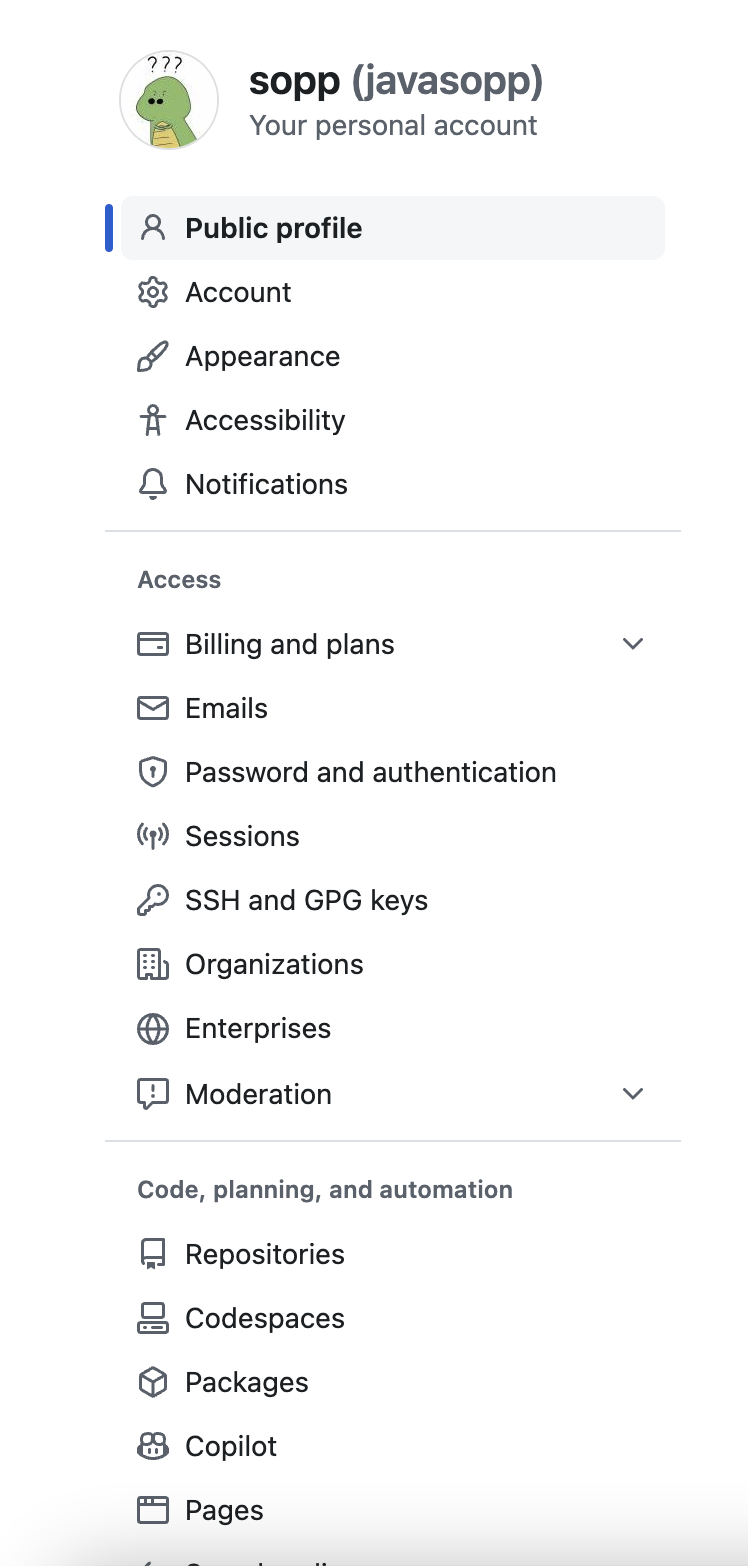
拖到最下面,然后选择部署设置

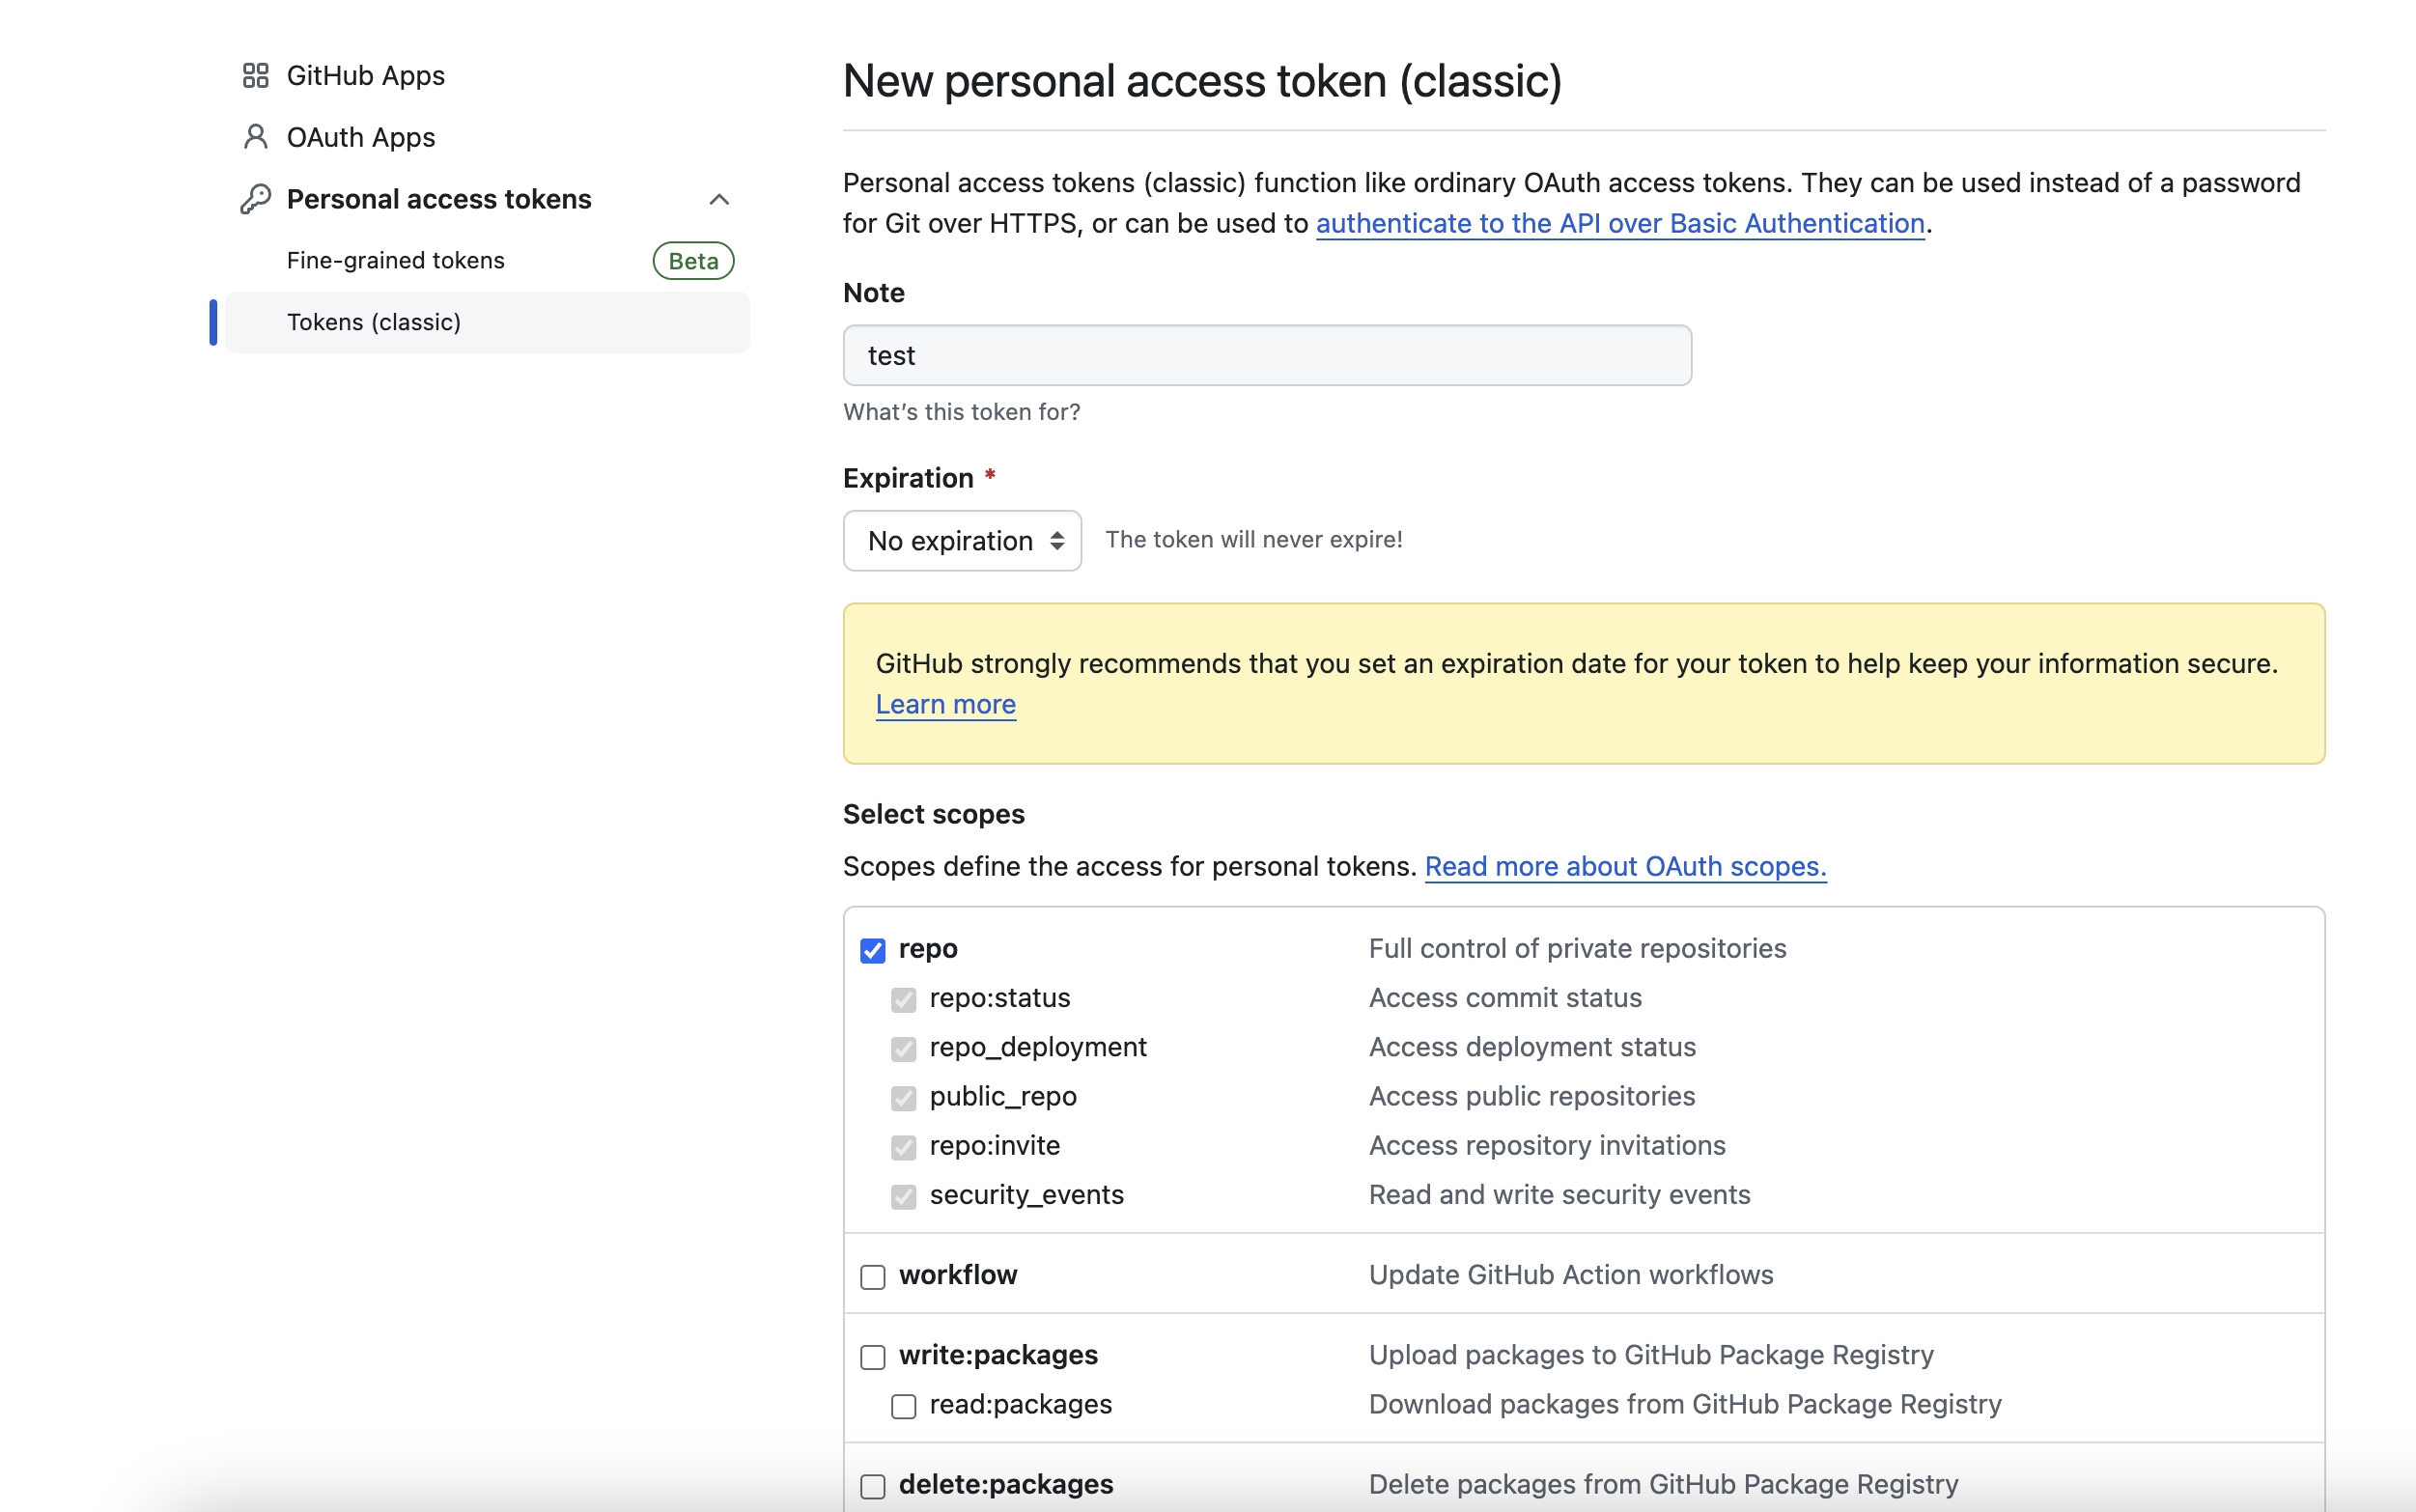

3. 配置picgo
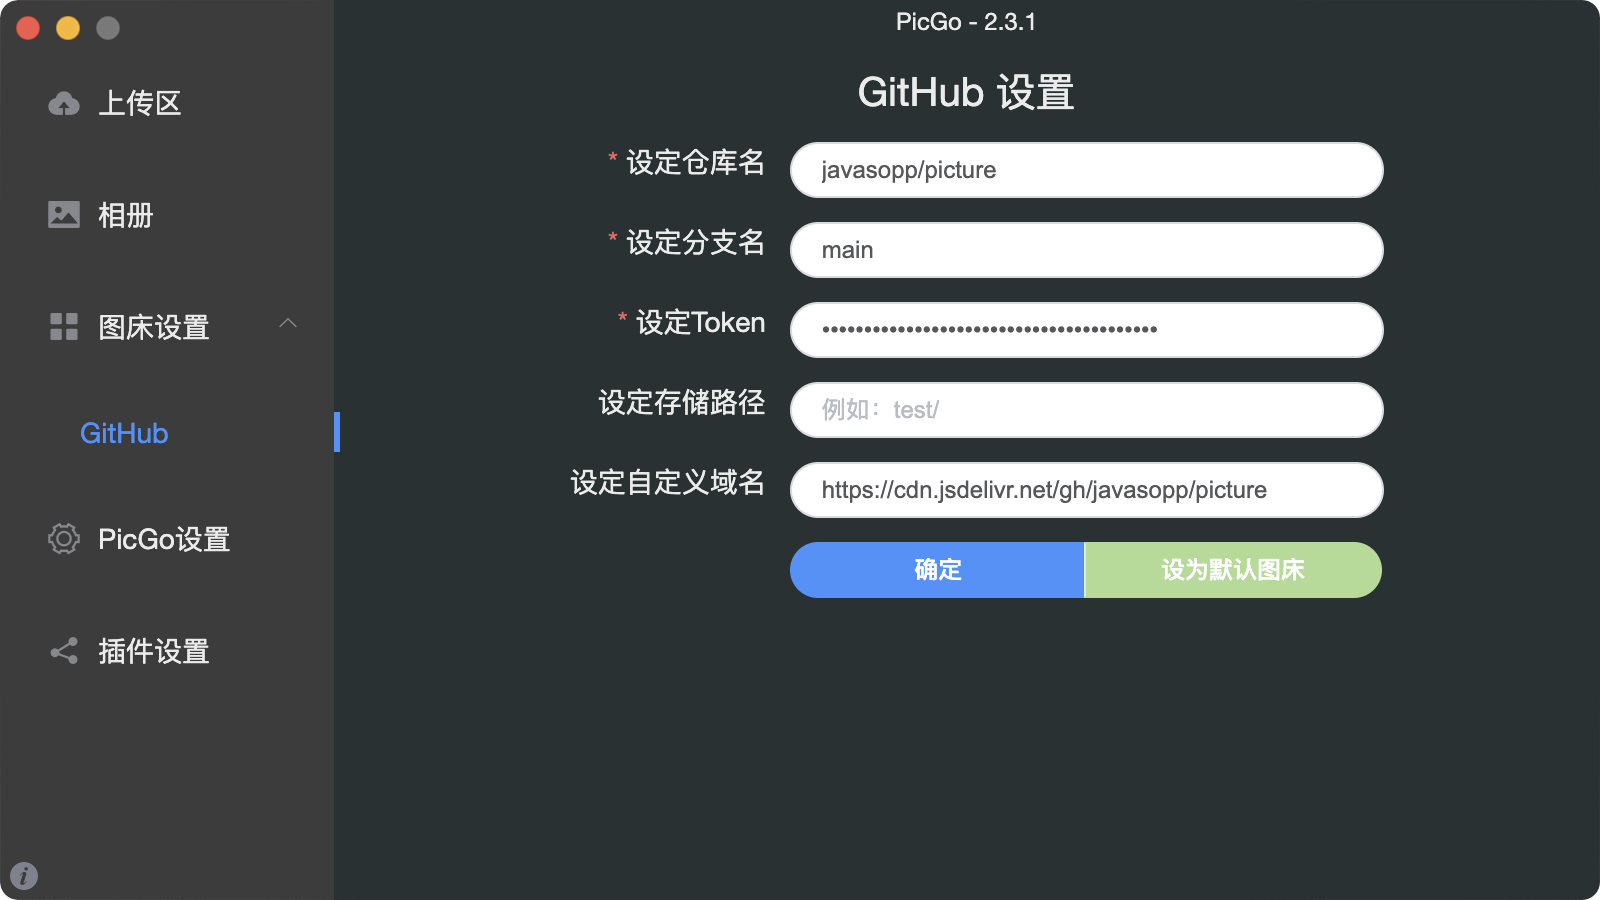
内容解释:
- 仓库名: 你个人的github名,例如: javasopp/picture
- 分支名: 默认分支为master,修改为main
- 设置token: 这里的token,设置为上一步生成的token
- 设置自定义域名: 可以设置github图床加速,详见使用jsDelivr加速github图床
保存即可。
4. typora设置上传到picgo
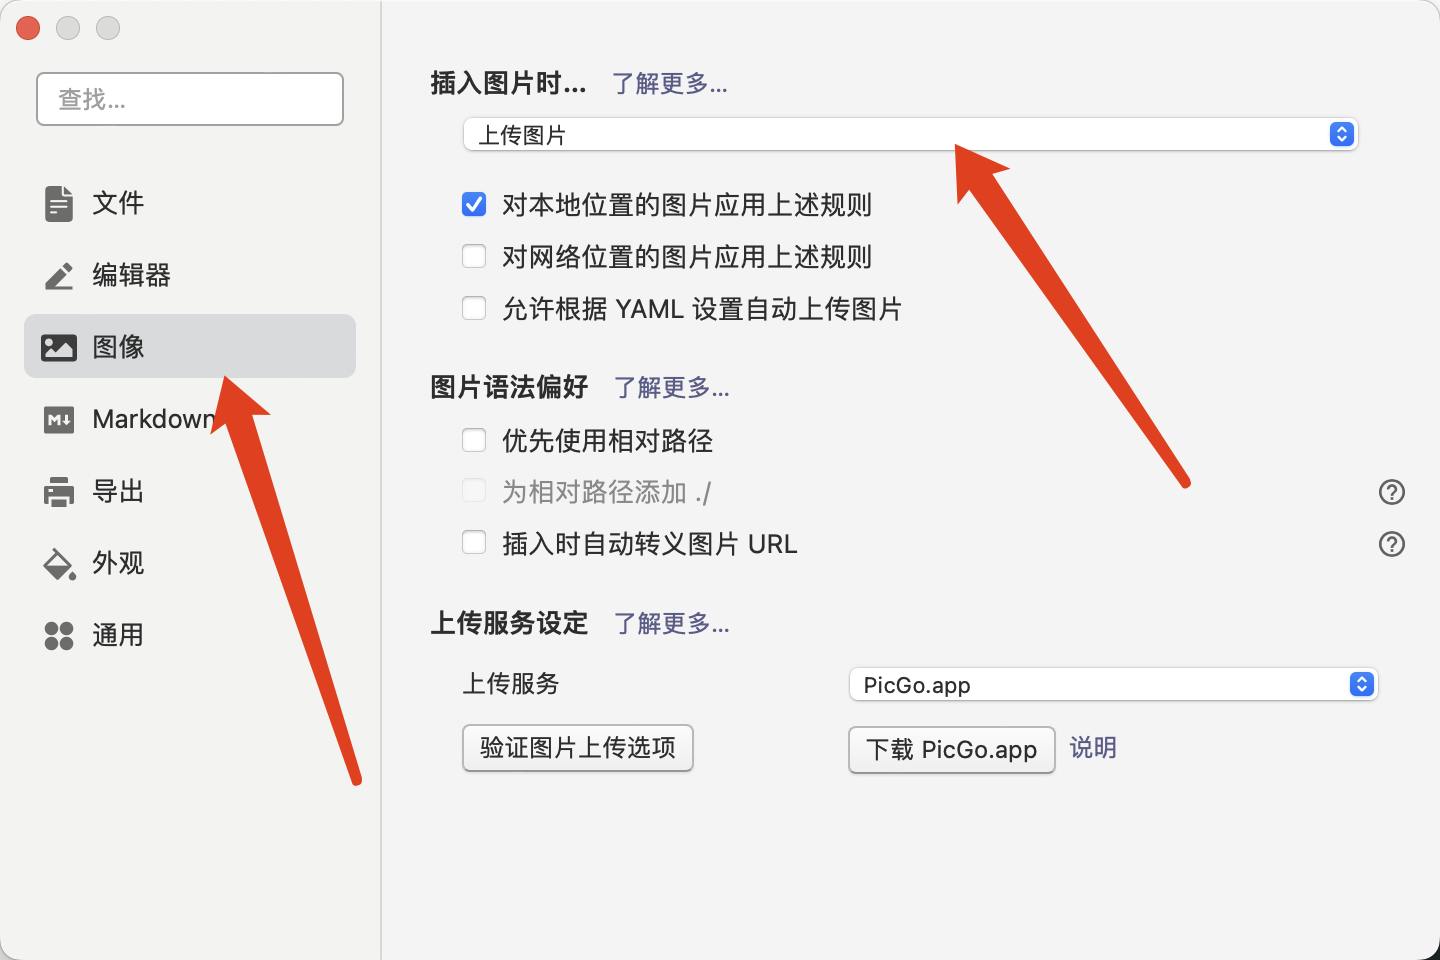
最终点击验证图片上传选项 验证是否上传成功即可。
本文是原创文章,采用 CC BY-NC-ND 4.0 协议,完整转载请注明来自 sopp
评论
匿名评论
隐私政策
你无需删除空行,直接评论以获取最佳展示效果

